
This post about our Ball® Jar Centerpiece DIY is sponsored by Ball® Canning. All opinions are 100% our own!
My huge farmhouse style dining room table has been begging for a new centerpiece for the Summer. I decided to DIY one using Ball® Jars with craft supplies from Michaels! We love Ball® Jars for anything and everything around our house. From canning, to DIY, to a great drinking glass, Ball® Jars are our favorites! I've been spray painting them for years! For this project, I decided to chalk paint them. I would usually use a chalk brush for these, but for the jars I just used a regular brush. Make sure to click here to download Michaels coupons before your visit to save on your crafting supplies. Keep reading below for our step-by-step guide on making your own Ball® Jar centerpiece DIY!

I headed to my local Michaels to pick up all the supplies I needed for our project. They had so many great options to choose from (as always!). I picked up a 12 pack of pint sized Ball® Jars, chalk paint, paint brushes, wooden tray and twine to complete my project.


Succulents are pretty fool proof. They don't take much water or maintenance, and they look so beautiful in your home. I usually water mine once a week and they are good to go! Try to put them in a spot that gets quite a bit of sun if you can. For this project, I picked mine up at our local nursery. These jars would also make beautiful vases for fresh flowers. You could also fill them with some of the beautiful faux flowers Michaels carries!
Make sure your jars are clean and dust free. Screw off the tops and set them on some newspaper to get ready to paint.
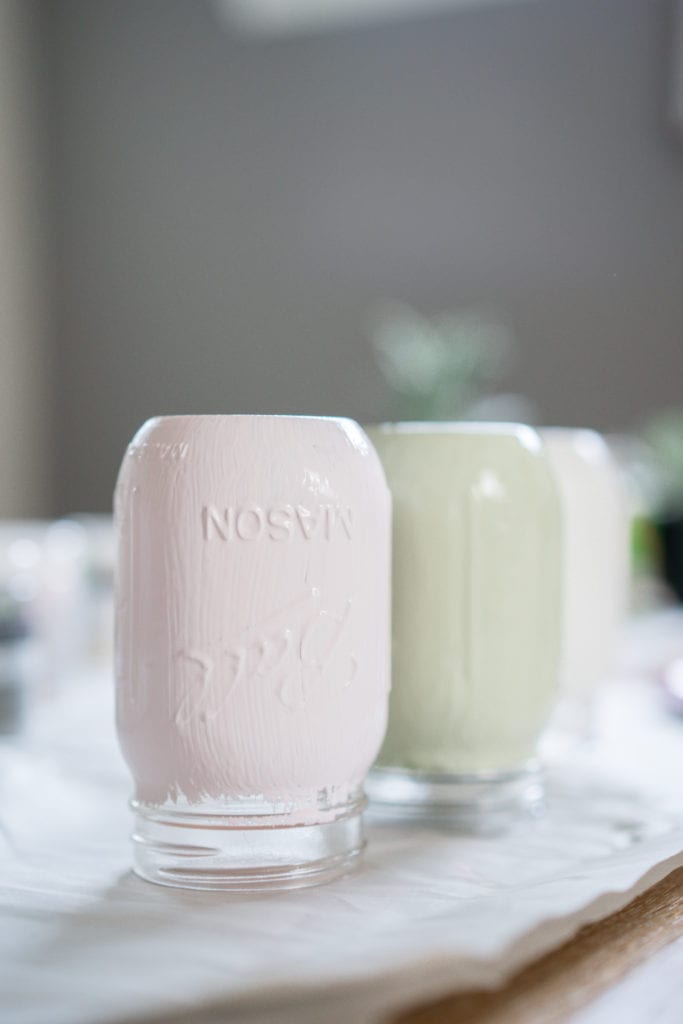

Next, we'll start painting our jars! Since I used chalk paint, it goes on pretty thick so you'll want to use a thin coat on each jar. I decided to go with neutral pastels. The green I chose was a little too bright for me, so I ended up toning it down by mixing a little with our white chalk paint. Let them dry, and paint one more coat. They ended up taking quite a while to dry between coats, so keep that in mind.

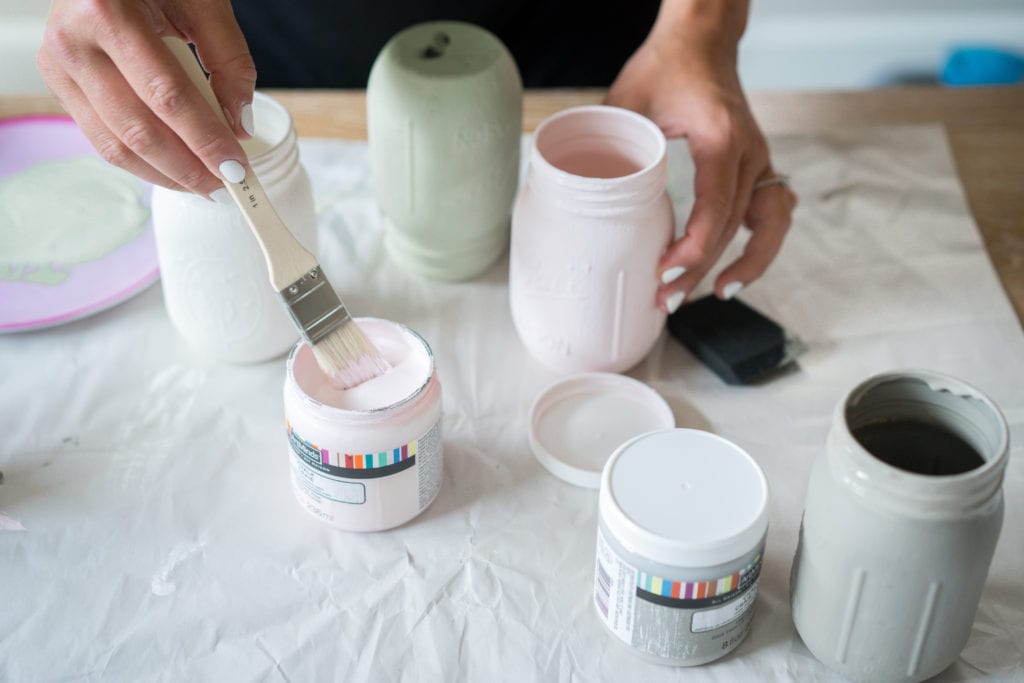
pink paint / white paint / green paint / grey paint
Apply a super thin layer of wax to seal the paint. This is especially important since they are holding fresh flowers and you'll be watering them.

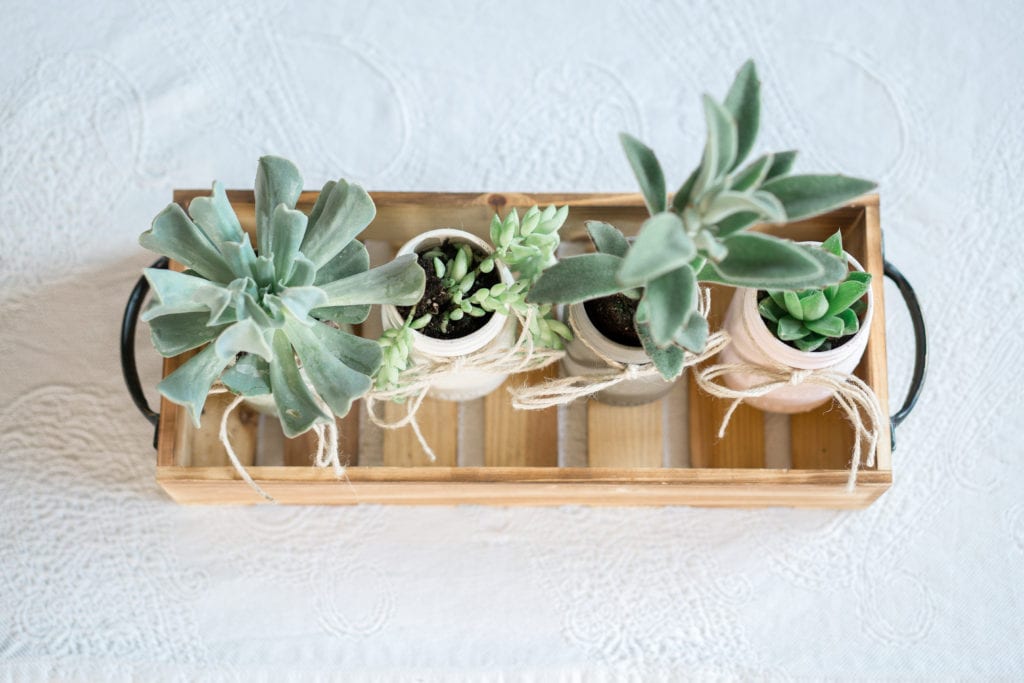
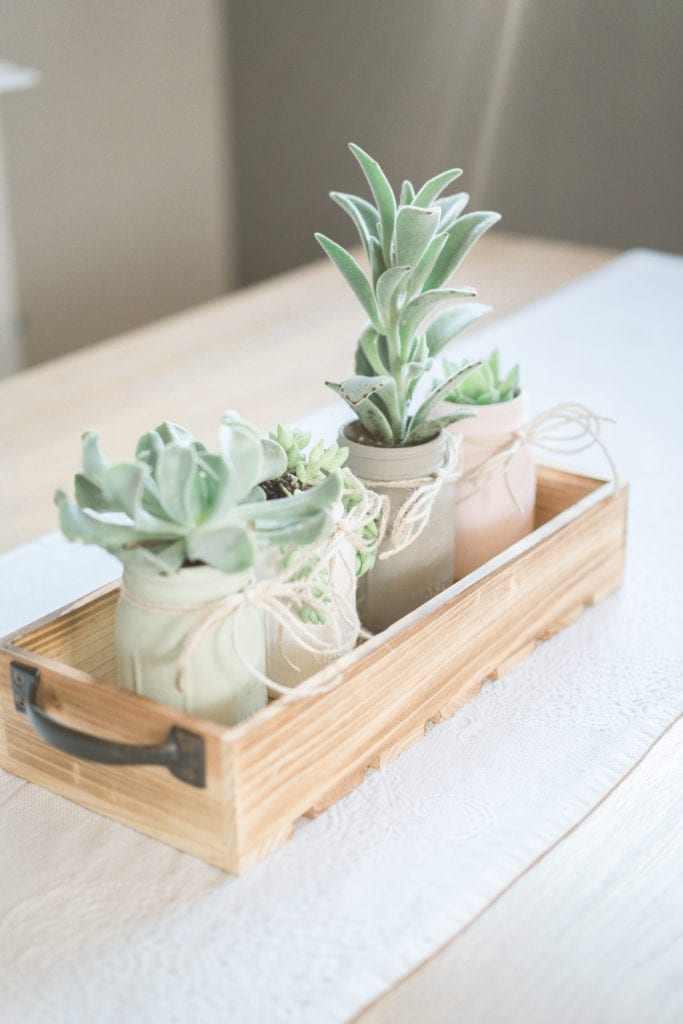
I picked up succulents at my local nursery. Fill your jar half way with planting soil. Then add your succulent and fill in the rest with soil. I probably went a little large on my succulents and could have gone with smaller plants. This was all they had in stock, but I think we made it work!

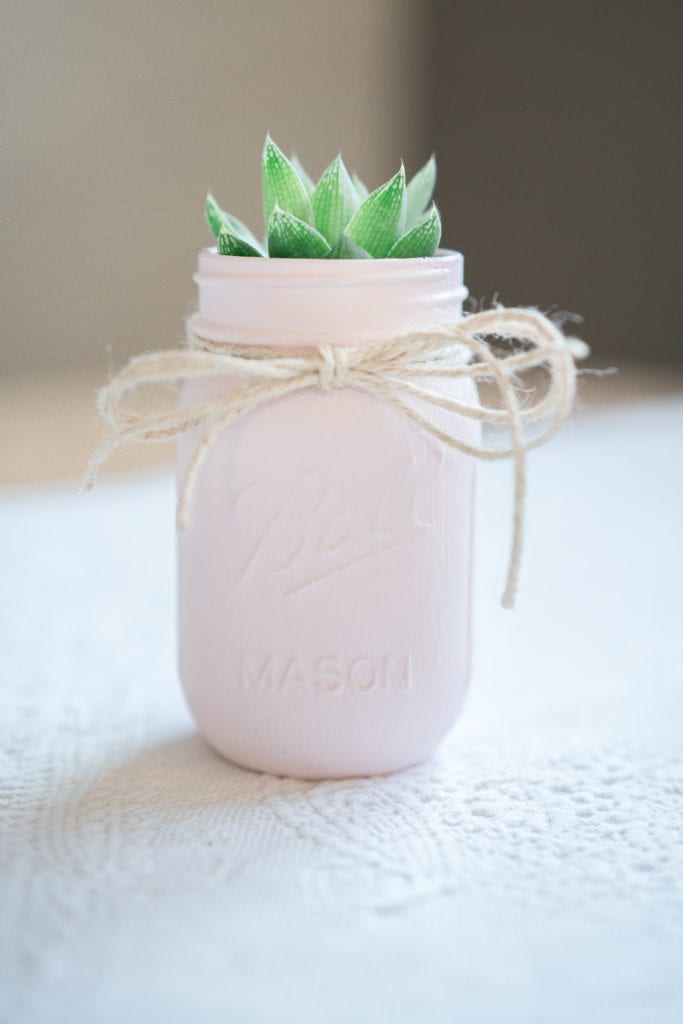
I like to finish the jars off with some twine tied around the opening. I think this gives it a more put together look. You could also layer some twine with ribbon or leave them plain.
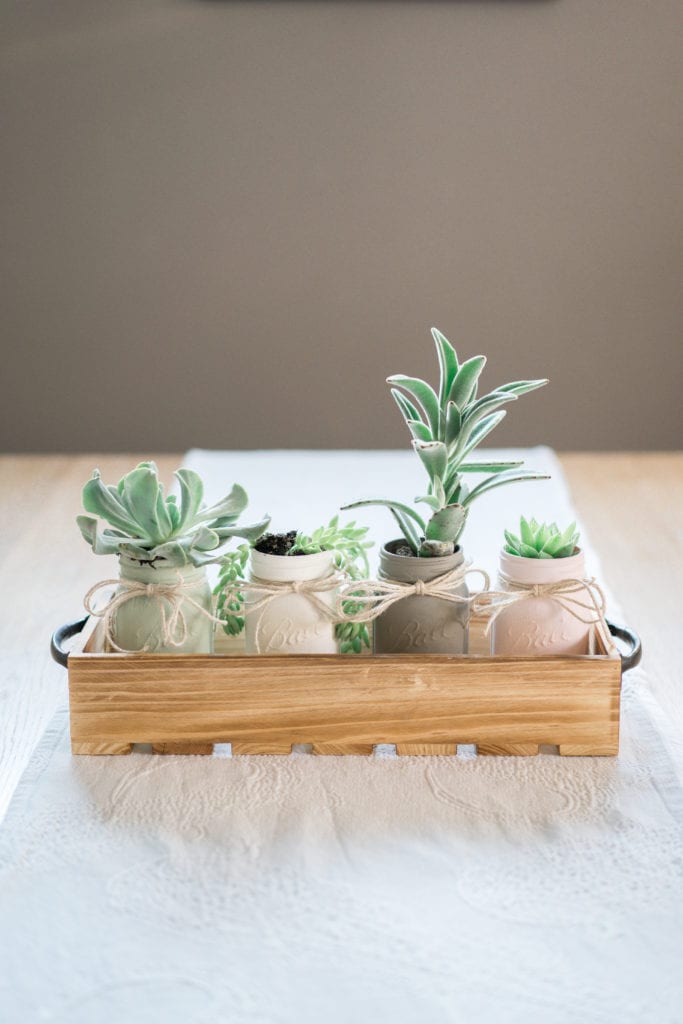

The last step is to arrange them in your centerpiece box. I found this one at Michaels, and I love how it looks! It can also be repurposed for other items such as candles or flower vases. I went for succulents of varying heights, and I love how they look in this wooden box.

I have to say that I am absolutely obsessed with how these turned out! The vision I had of these in my mind really came alive, thanks to Michaels and Ball® Jars! They were so simple to make, although I didn't allocate enough time for the paint to dry. It took around 2 hours between each coat, so make sure to keep that in mind if you're planning this project. These could also make great teacher gifts, housewarming gifts, or to put throughout your home as decor accents.

Have you ever DIY'd Ball® Jars before? I'd love to hear what you came up with! They really are so versatile and I always have a lot around our home! Thanks so much for reading and please let me know if you have any questions about this project!
Pin this for later!
