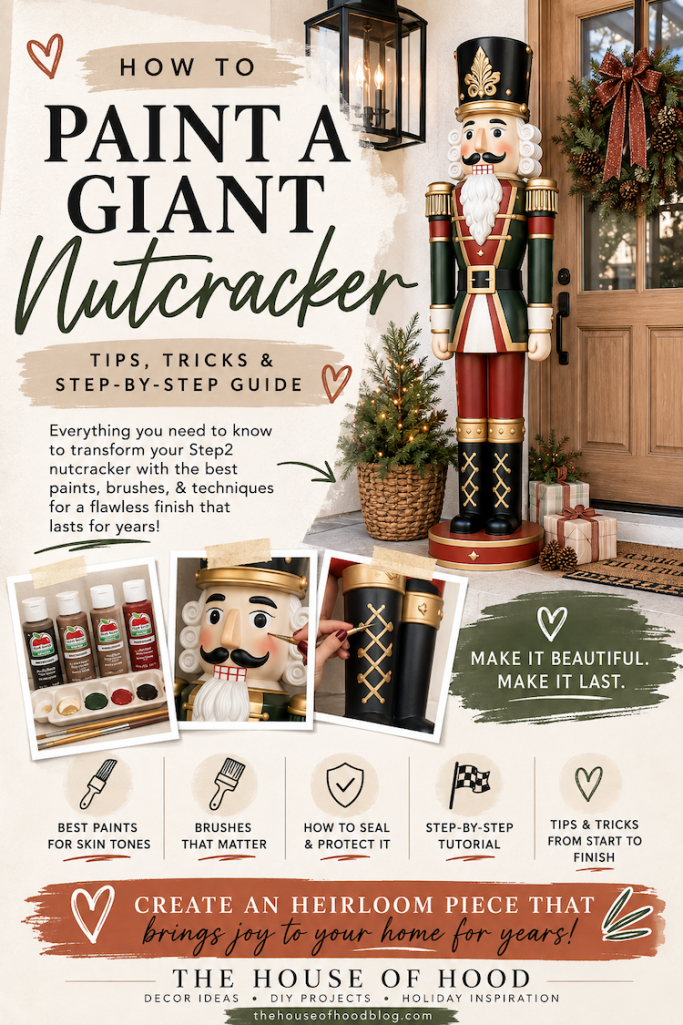
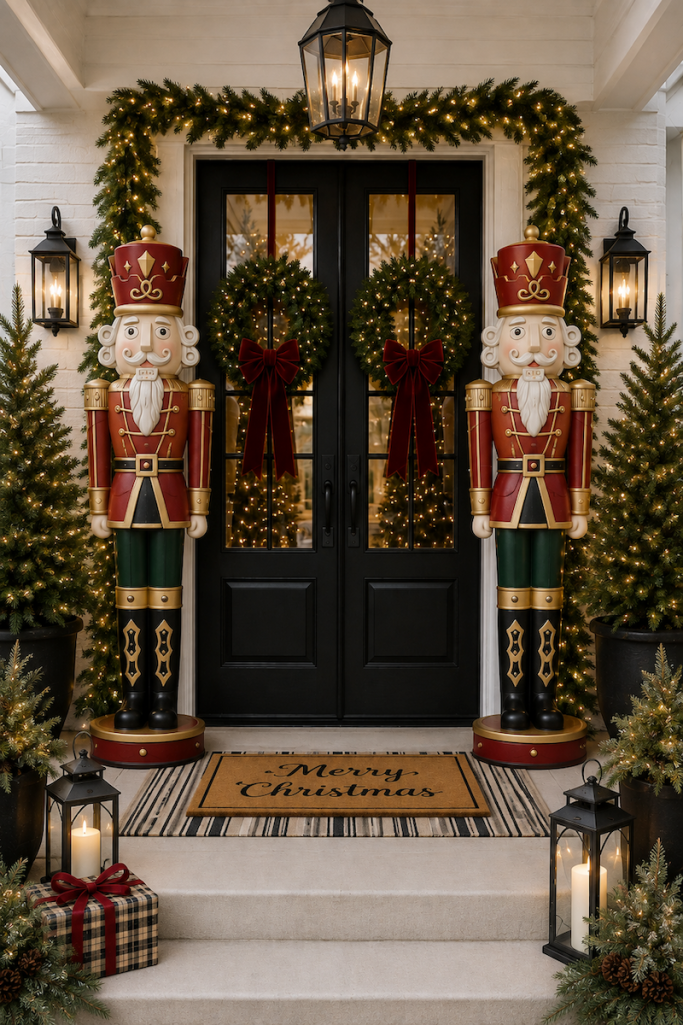
If you were lucky enough to snag one of the giant paintable nutcrackers that have become so popular over the last few holiday seasons, now comes the fun part: deciding exactly how you're going to paint it! These oversized nutcrackers are such a fun Christmas DIY because you can completely customize them to coordinate with your holiday décor. Whether you're painting the popular 6-foot Walmart nutcracker or the 6 foot Step2 paintable nutcracker, or another oversized version, the basic painting process is very similar.
SHOP THE 2026 6 FOOT NUTCRACKER WHILE IT'S STILL IN STOCK HERE!
This post updated September 2026!
After sharing my 6-foot Walmart nutcracker DIY, I've received so many questions about what type of paint to use, whether you need primer, which brushes work best, and probably the biggest question of all, how to paint the face and eyes. The good news is that you absolutely do not need to be an artist to paint a giant nutcracker. The secret is taking your time, using the right supplies, and working in thin layers rather than trying to make everything perfect on the first coat.
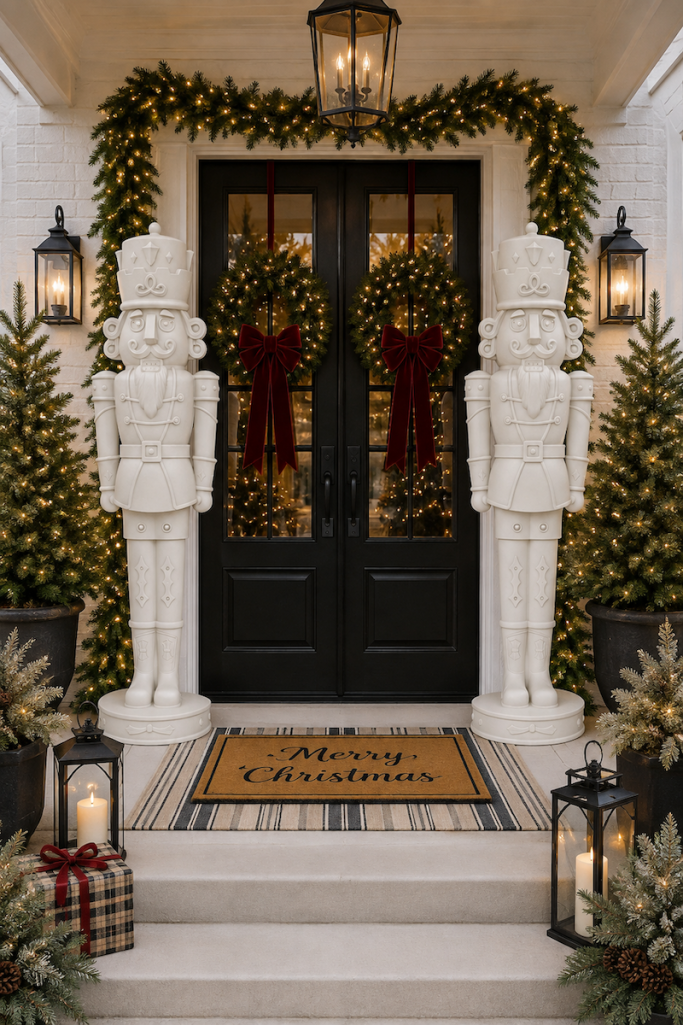
Below, I'm sharing everything you need to know about how to paint a giant nutcracker, including how to prep and prime it, which paint and brushes to use, how to tackle those intimidating eyes, and some of the biggest mistakes you'll want to avoid.
Before you begin, gather your supplies so you aren't hunting for a tiny paintbrush halfway through painting an eyeball! You don't need dozens of expensive artist brushes or specialty products, but having a few different brush sizes makes this project so much easier.
I recommend having:
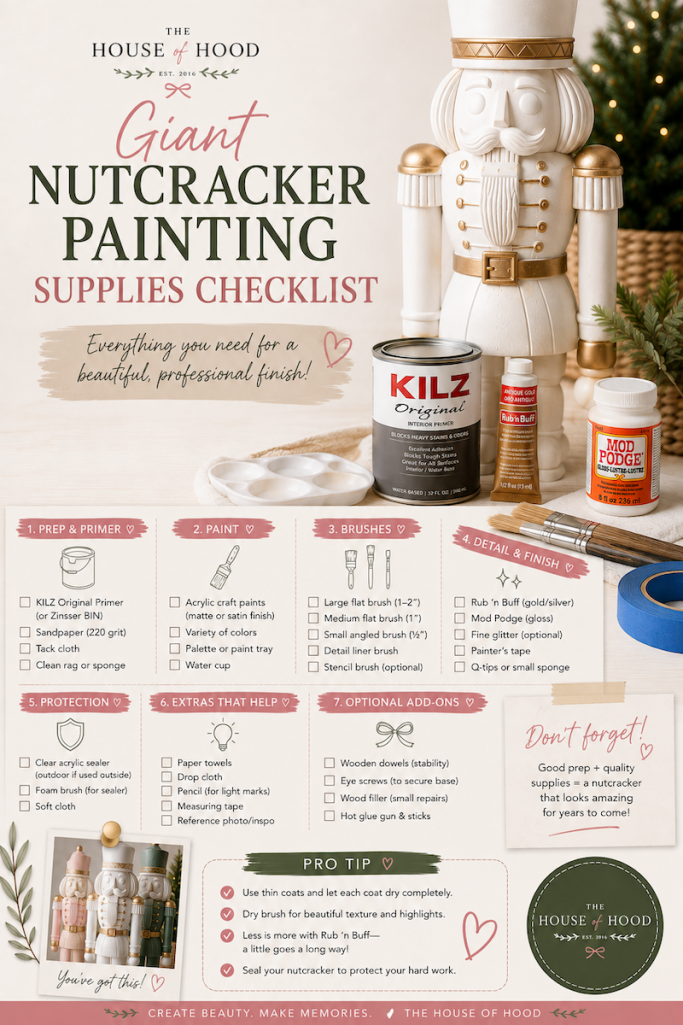
A good synthetic brush assortment plus one larger flat brush will handle almost everything on a giant nutcracker. I especially like having several inexpensive detail brushes nearby because you'll use them constantly once you get to the face, trim, buttons, and other small areas.
Even if your nutcracker is brand new, don't skip cleaning it. Plastic can have dust, oils, or manufacturing residue on the surface, and those can interfere with how well your primer and paint adhere. Spending a few minutes cleaning it now can save you from dealing with peeling or uneven paint later.
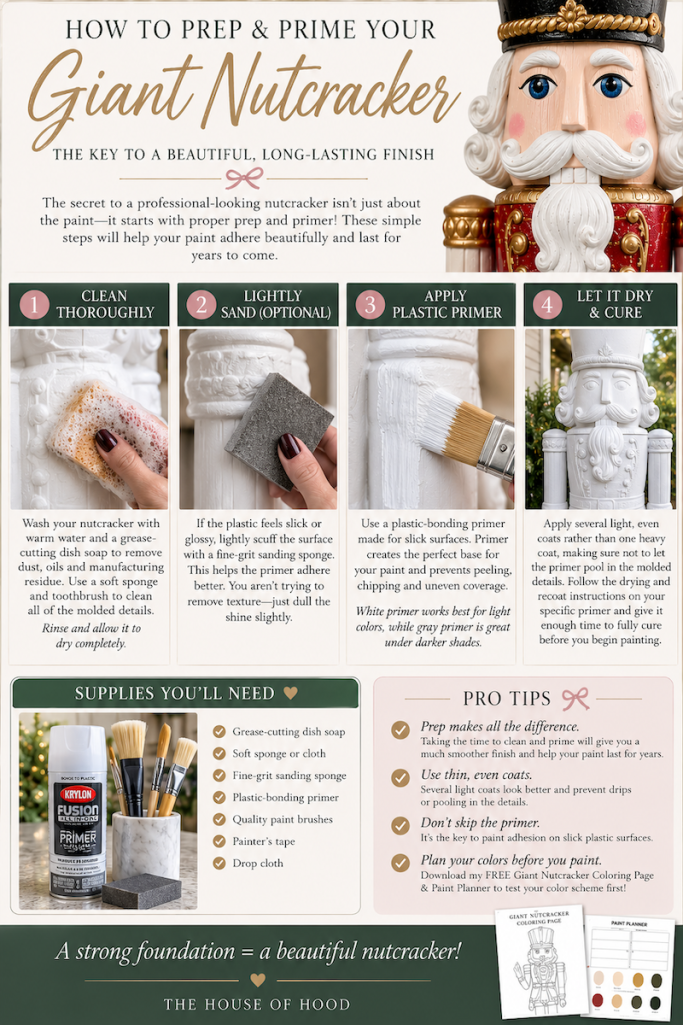
Wash the nutcracker with warm water and a small amount of grease-cutting dish soap using a soft sponge or cloth. A soft toothbrush is also really helpful for getting into grooves, scrollwork, hair, and other molded details. Rinse everything thoroughly and allow the nutcracker to dry completely before moving on.
If the plastic feels particularly slick or glossy, you can also lightly scuff the surface with fine-grit sandpaper or a sanding sponge. You aren't trying to sand away the molded texture or details—you just want to dull a very slick surface enough to give the primer something to grip.
Technically, you can paint some plastic surfaces without primer, but on a project this large I wouldn't recommend skipping it. A plastic-bonding primer gives your acrylic paint a much better surface to adhere to and can help prevent streaking, beading, and peeling. It's one extra step, but after spending hours painting a six-foot nutcracker, you definitely want your work to last.
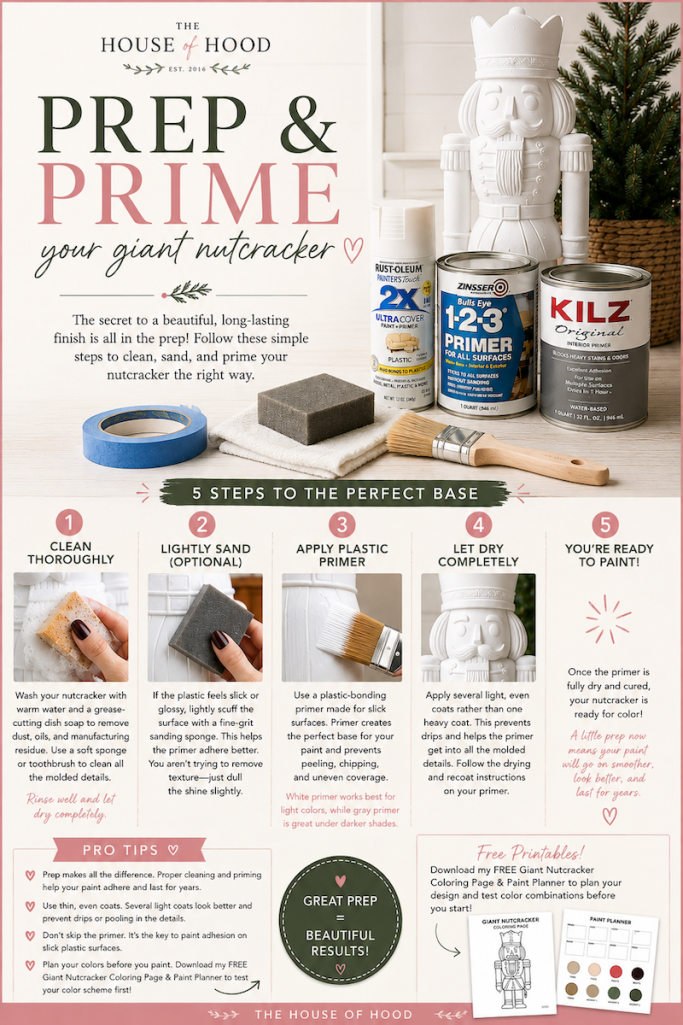
White primer is a great choice if your design includes lots of white, cream, blush, pastels, or other light colors. Gray primer can work well underneath darker shades like navy, burgundy, forest green, and black. Whatever you choose, make sure the primer specifically states that it works on plastic.
Apply several light, even passes rather than trying to cover everything with one heavy coat. Thick primer can drip or pool inside the nutcracker's molded details, which can actually make those beautiful details harder to paint later. Always follow the temperature, drying, and re-coat instructions on your specific primer, and give it enough time to properly dry or cure before you begin painting. This is the specific primer I personally used.
This is the fun part, and it's something I really recommend doing before opening a single bottle of paint. Decide on your entire color palette ahead of time and think about how the hat, face, hair, beard, coat, sleeves, belt, boots, base, and metallic accents will all work together. It's much easier to change your mind now than after you've painted half of a six-foot nutcracker!
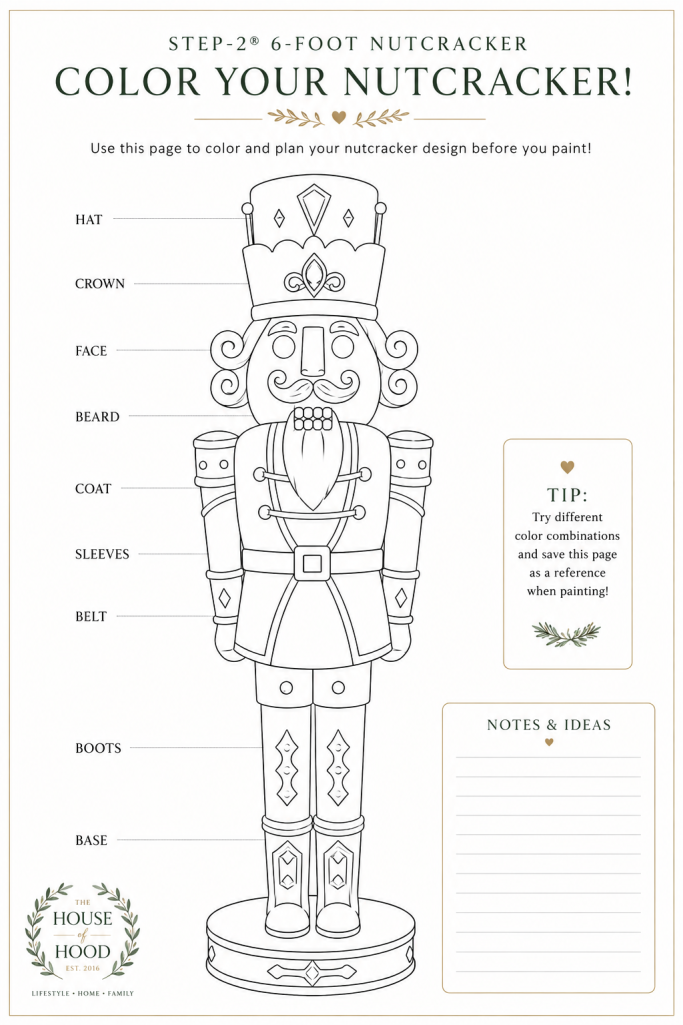
I've created a FREE Giant Nutcracker Coloring Page and Paint Planner (click here for the Walmart version and here for the Step2 version) specifically for this. Print a few copies and experiment with completely different color combinations until you find one you love. You can also write down the exact paint brand, color name, and finish you're using so you have a record for future touch-ups.

If you're mixing a custom acrylic paint color, make more than you think you'll need for that section. Recreating the exact same shade later can be surprisingly difficult, especially if you've mixed several colors together. I also recommend letting a small test swatch dry before committing because acrylic paint can look slightly different once it's completely dry.
Once your color palette is planned, start with the largest areas such as the coat, pants, hat, and boots before moving onto tiny details. A 1–2 inch synthetic flat brush is perfect for these sections because it covers more surface area and creates fewer brush strokes than a tiny craft brush. Save those smaller brushes for the details later.
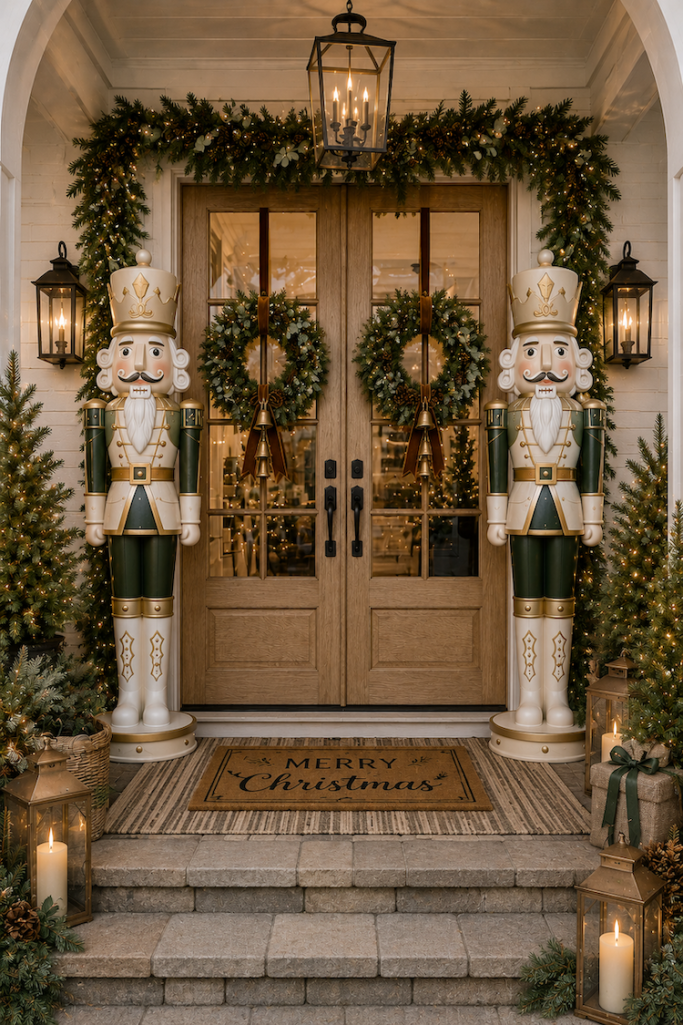
The key here is thin coats. Don't try to get perfect opaque coverage with one thick layer of acrylic paint because that's much more likely to create drips and visible brush marks. Two or three thin coats will usually give you a much smoother and more professional-looking finish.
Another important tip is to leave the paint alone once it begins getting tacky. Going back over partially dried acrylic paint with your brush can lift the paint underneath and create texture and streaks. Let each coat dry, then come back with another thin layer.
The shape and size of your brush makes a surprisingly big difference when you're painting all of the molded details on a giant nutcracker. For straight trim, belts, and cuffs, a small flat brush works beautifully. An angled brush gives you more control around curved trim, while small round and liner brushes are ideal for buttons, facial features, eyelashes, and tiny decorative details.
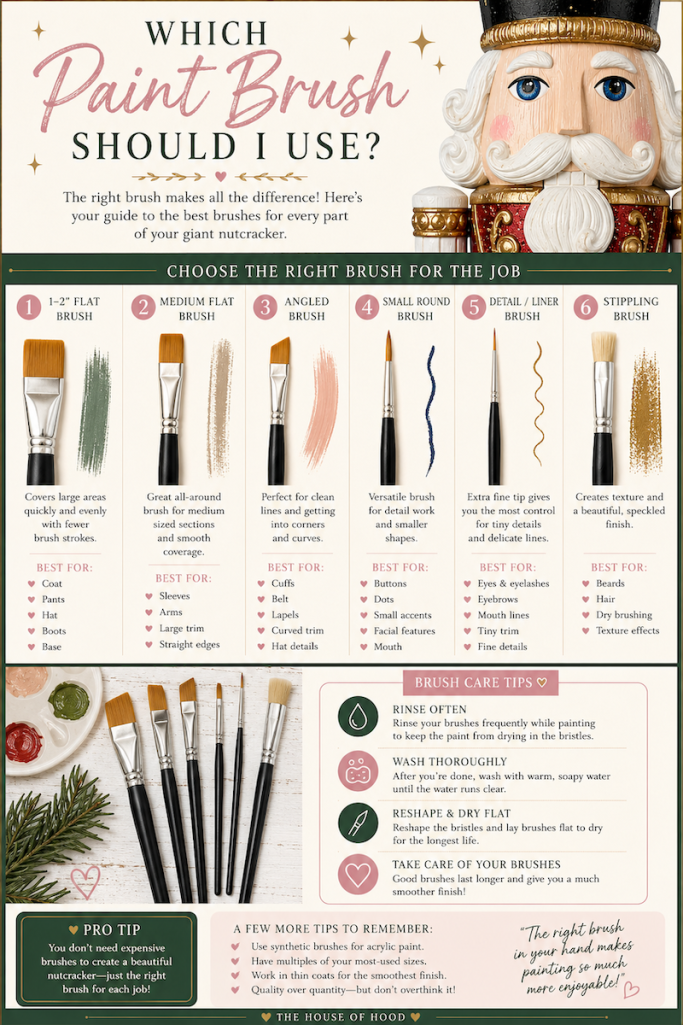
One of the best things about these paintable nutcrackers is that so many of the details are already molded into the plastic. Let those raised edges guide your brush instead of trying to freehand everything. Working a few inches at a time also makes it much easier to create a clean edge than trying to paint one long perfect line.
Painter's tape can be helpful on long, straight sections, but don't assume you need to tape every single detail. Tape can actually become frustrating around curves and textured surfaces. In those areas, I find that a good small angled brush and a steady hand often give you more control.
The eyes are probably the most intimidating part of painting a nutcracker, but they are completely doable when you break the process into layers. The biggest trick is to work on both eyes at the same time rather than completely finishing one eye before beginning the other. This makes it much easier to keep the size, placement, and direction consistent.
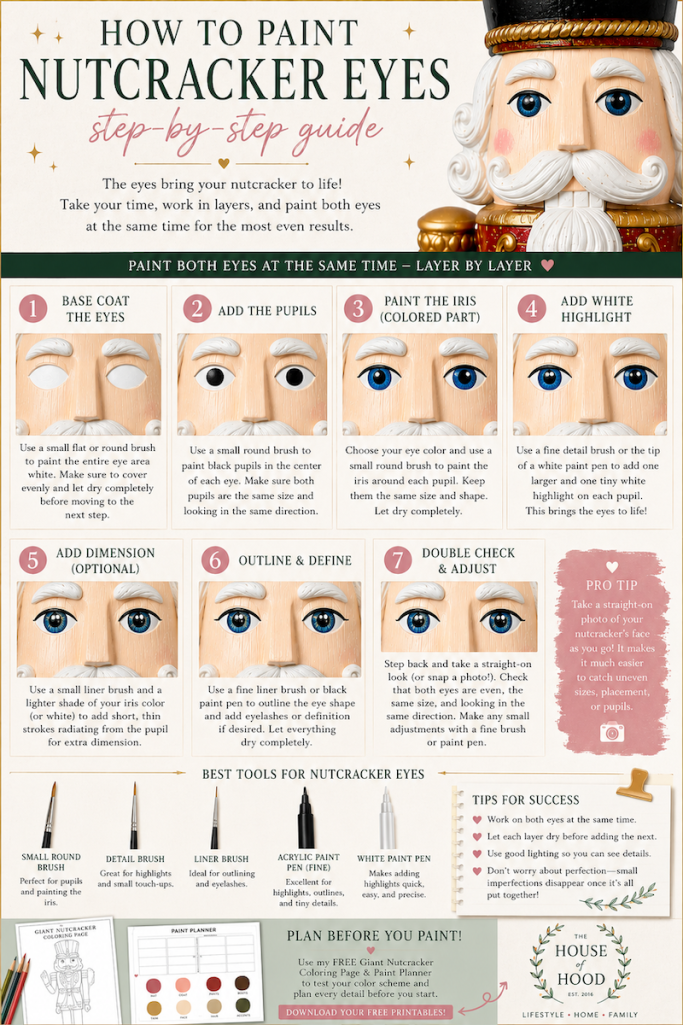
Start by painting both entire eye areas white and allow them to dry completely. Next, paint matching irises in your chosen eye color, followed by black pupils. Before the pupils dry, step back several feet and make sure they're approximately the same size and looking toward the same point.
Once everything is dry, add lighter strokes around the iris to create dimension. Finish with one larger and one tiny white highlight on each pupil to give the eyes that bright, reflective look. Fine-tip acrylic paint pens are especially helpful for pupils, highlights, eyelashes, outlines, and tiny corrections.
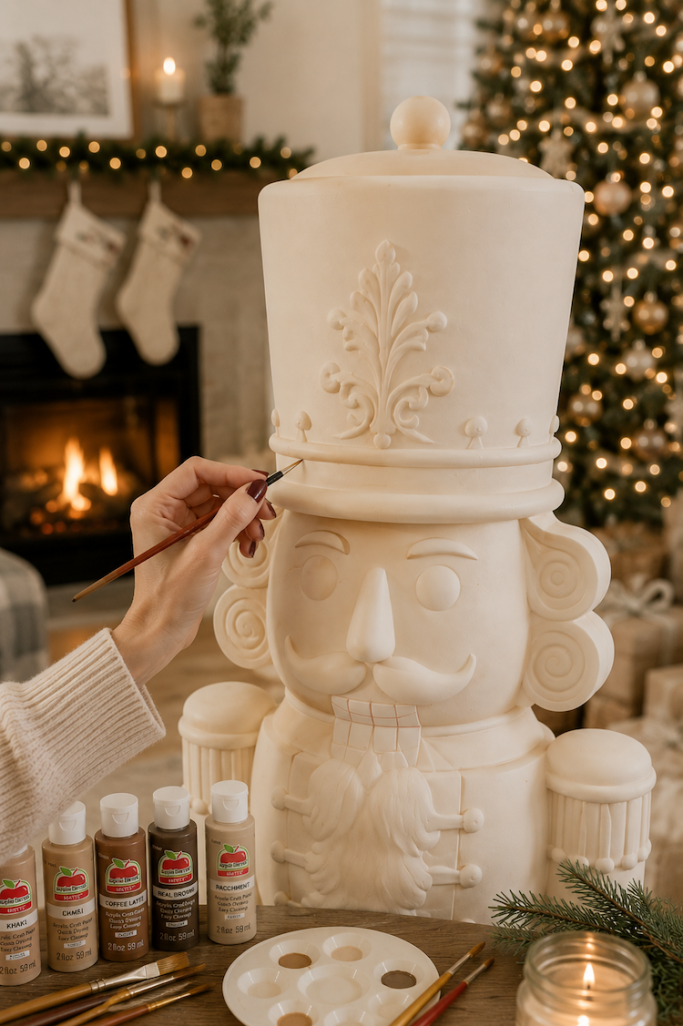
One of my favorite tricks is to take a straight-on photo of the nutcracker's face with your phone while you're working. Uneven pupils, eye sizes, or placement somehow become much easier to spot in a photo than when you've been staring at the actual nutcracker for an hour!
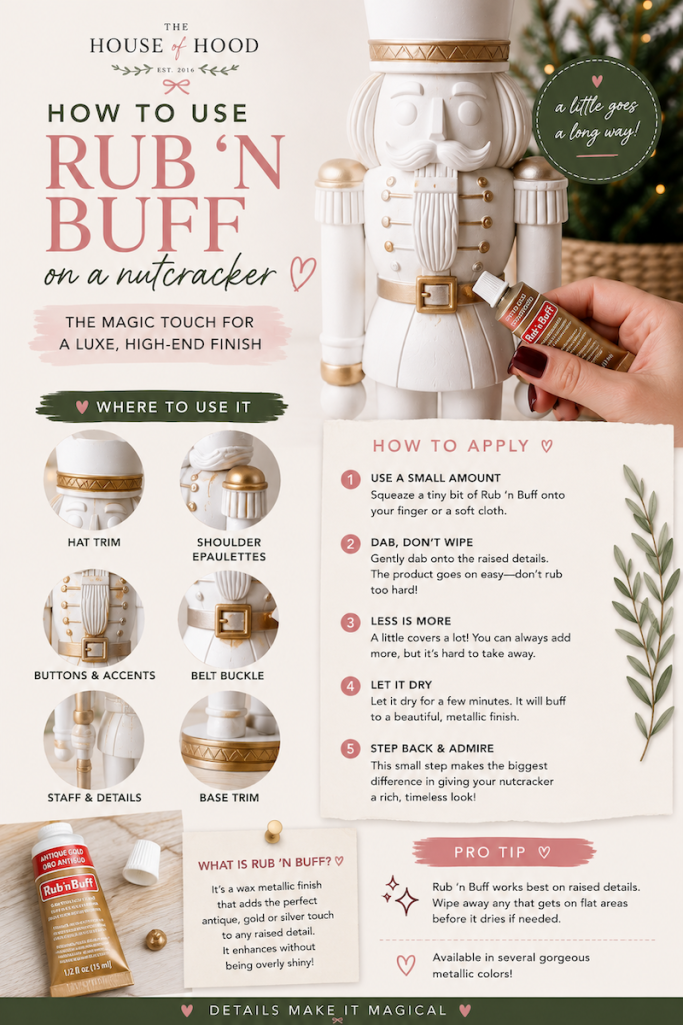
Once all of your main colors are finished, adding metallic accents can completely transform the nutcracker. Metallic acrylic paint works beautifully on buttons, buckles, hat details, boot trim, and decorative scrollwork. Gold, champagne, antique brass, silver, and copper can all give an inexpensive paintable nutcracker a much more elevated look.
You can also use Rub 'n Buff, a wax-based metallic finish, on raised areas. You need very little product, so start with a tiny amount and gradually build the finish. It's especially pretty on raised scrollwork and details where you want more of an antiqued or dimensional metallic effect rather than a completely solid painted surface.
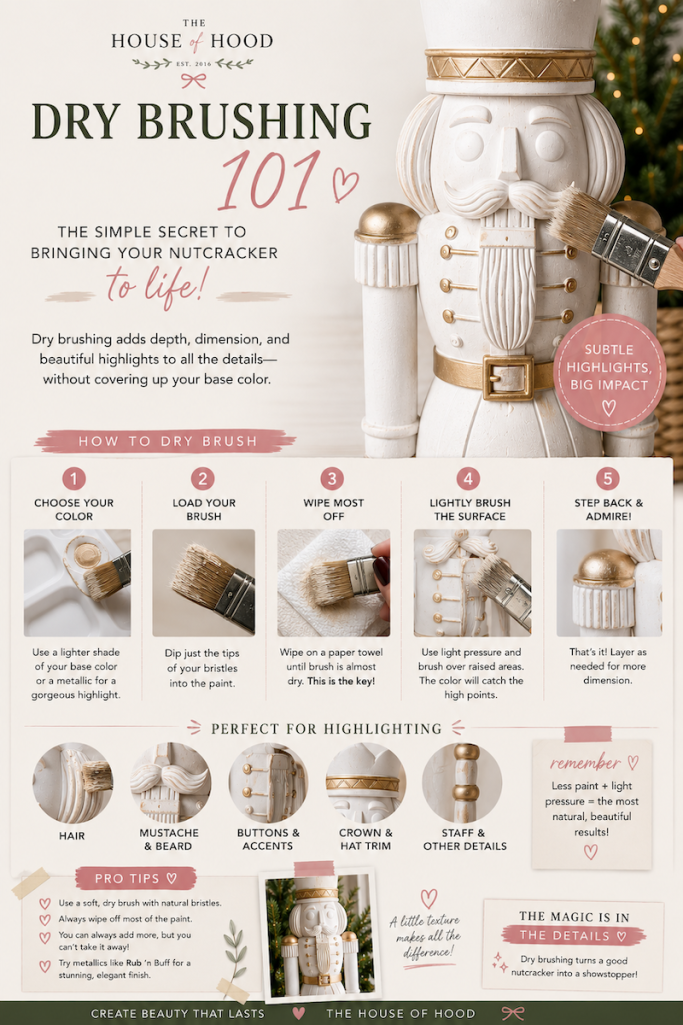
Dry brushing is another easy way to create dimension. Dip just the ends of a dry brush into a lighter paint color, remove almost all of it onto a paper towel, and then lightly brush across the raised texture. This technique works especially well on hair, beards, mustaches, wood-grain texture, and decorative molded details because the raised areas pick up the lighter color while the recessed areas remain darker.
If you want your giant nutcracker to have a little extra Christmas sparkle, glitter is such a fun way to highlight some of the molded details. I wouldn't necessarily cover the entire nutcracker in glitter. Instead, I love the look of using it strategically on areas like the hat, cuffs, buttons, boots, decorative trim, or raised details. A little glitter mixed with painted and metallic finishes can make the finished nutcracker look much more dimensional.

For the cleanest result, paint the area underneath the glitter first in a similar color. For example, if you're using red glitter, paint the section red before adding glitter. This gives you a solid base so you don't have to apply an excessive amount of glitter to achieve full coverage.
There are a few different ways to attach glitter. You can brush a thin, even layer of Mod Podge or another clear-drying craft adhesive over the painted area and sprinkle loose glitter on top. Work in small sections so the adhesive doesn't begin drying before you add the glitter. Place a piece of paper underneath while you're working so you can catch the excess glitter and pour it back into the container.
For smaller details, I actually prefer a fine glitter or glitter acrylic paint because it's much easier to control than chunky loose glitter. You can build up several thin coats until you reach the amount of sparkle you want. This is especially useful around narrow trim, buttons, scrollwork, and other areas where loose glitter could get messy.
Once your glitter is completely dry, gently remove any loose excess before sealing it. Glitter can react differently to different topcoats and adhesives, so test your sealer on a small area first, especially if you're using a specialty glitter finish. A compatible clear topcoat can help keep loose glitter contained and make the finished decoration much easier to handle and store.
One thing to keep in mind is that some clear sealers can slightly dull glitter's sparkle. If you want maximum shine, test a few options on a sample surface before sealing the actual nutcracker. Taking this extra step is worth it when you've already spent hours painting!
TIP: Glitter is one of those details where less can be more. Instead of making every decorative element sparkle, choose two or three areas to highlight and repeat them throughout the nutcracker. You'll still get that magical Christmas look without losing all of the beautiful painted details underneath.
You will probably make a few mistakes while painting your nutcracker, and that's completely normal. If your brush slips outside a molded line, resist the urge to immediately start wiping at the wet paint because that can turn one tiny mistake into a much larger smear. In many cases, the easiest solution is simply to let it dry.
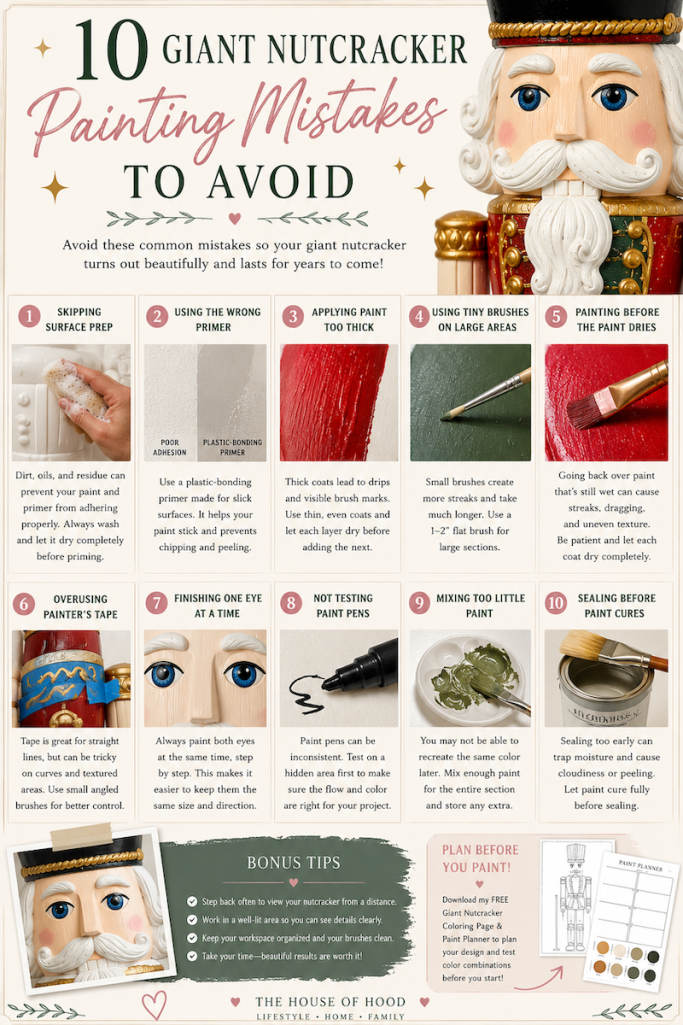
Once the mistake is dry, use a small detail brush and the surrounding base color to paint back over it and sharpen the edge. This is why I recommend keeping all of your main paint colors nearby until the entire nutcracker is finished. You'll probably use them several times for little touch-ups before you're done.
For tiny details, acrylic paint pens can also make corrections much easier. Just make sure you test them somewhere inconspicuous first and give every layer enough time to dry before adding another product over it.
After you've put this much work into your nutcracker, you'll want to protect it. Once all of the paint has completely dried and cured, use a clear sealer that's compatible with your paint and rated for the environment where you'll be displaying the nutcracker. If yours will be outside, choose an exterior-rated product.

Apply several light coats according to the manufacturer's instructions instead of one heavy coat. If you've used specialty finishes like Rub 'n Buff or acrylic paint markers, I recommend testing your sealer on an inconspicuous area first because different products can react differently when they're top-coated.
Even when sealed, I would still place a hand-painted nutcracker in a covered or somewhat protected area whenever possible. Arizona weather may be very different from a snowy or rainy climate, but sun, moisture, and extreme temperatures can all eventually take a toll on hand-painted outdoor décor.
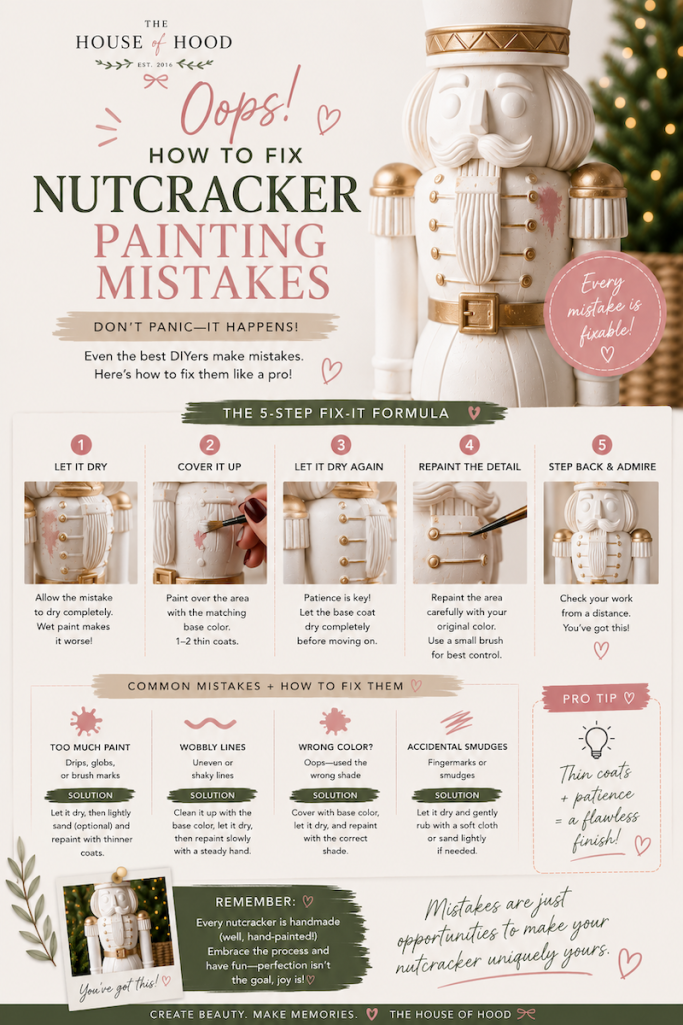
There are a few mistakes that can make this project much more difficult than it needs to be. Skipping the surface prep, applying primer or paint too heavily, using tiny brushes on huge sections, and painting another coat before the previous one is dry are some of the biggest ones. I'd also avoid continuing to brush acrylic paint once it becomes tacky because that's one of the quickest ways to create streaks and texture.
When you get to the details, don't try to force painter's tape around every curve, and don't completely finish one eye before starting the other. Test paint pens before using them on prominent areas, mix plenty of any custom paint colors, and give everything plenty of drying time before sealing.
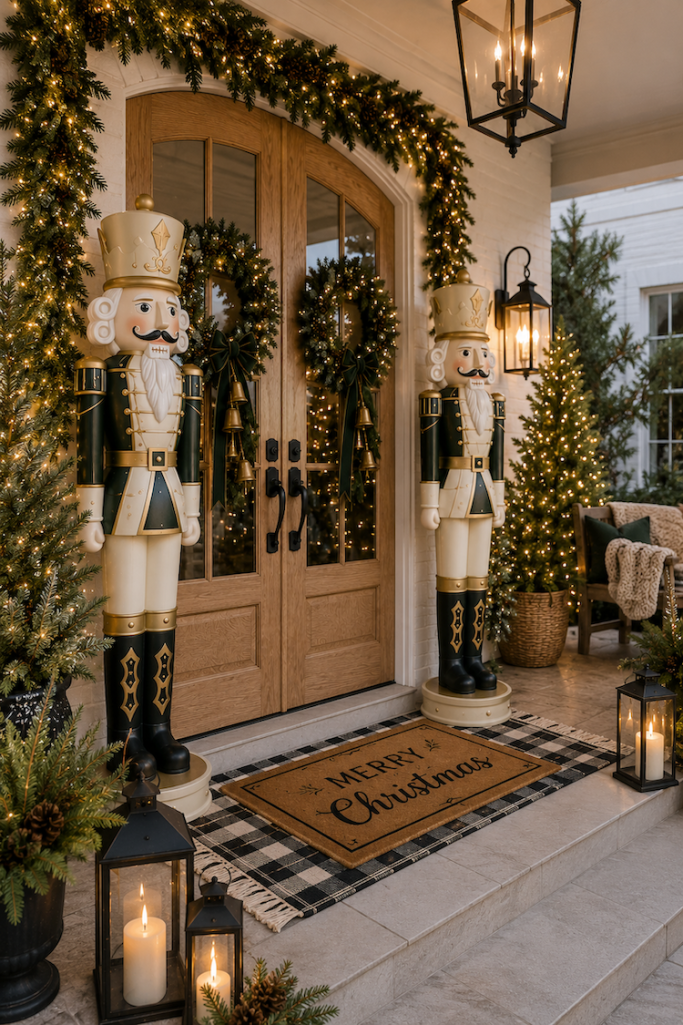
Most importantly, don't obsess over perfection while you're standing six inches away from your nutcracker. Step back every once in a while and look at the entire piece from several feet away. A six-foot nutcracker is meant to be viewed from a distance, and so many of those tiny imperfections you notice while painting completely disappear once the whole design comes together.
Click any image below to shop supplies needed:
Painting one of these oversized nutcrackers is definitely a project, but that's also what makes the finished piece so special. Instead of buying another mass-produced Christmas decoration, you're creating something completely customized to your holiday décor that you can pull out year after year. And once you've painted one, I have a feeling you're going to start dreaming up another color combination for the next one!
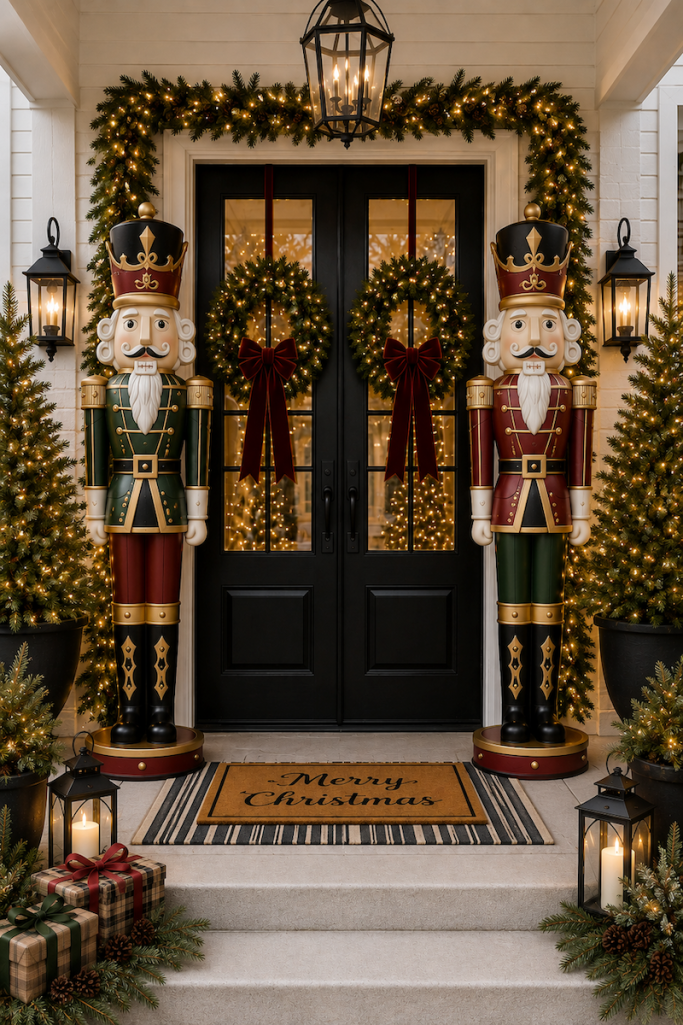
If you're painting the viral version, don't miss my complete 6-Foot Walmart Nutcracker DIY, where I share my original project from start to finish along with a ton of other nutcrackers for inspiration. Before you start painting, grab my FREE Giant Nutcracker Coloring Page and Paint Planner so you can experiment with colors and plan your entire design before that first brushstroke. Make sure to shop the Walmart nutcracker here before it sells out this year!
Happy painting!
Pin this for later!