
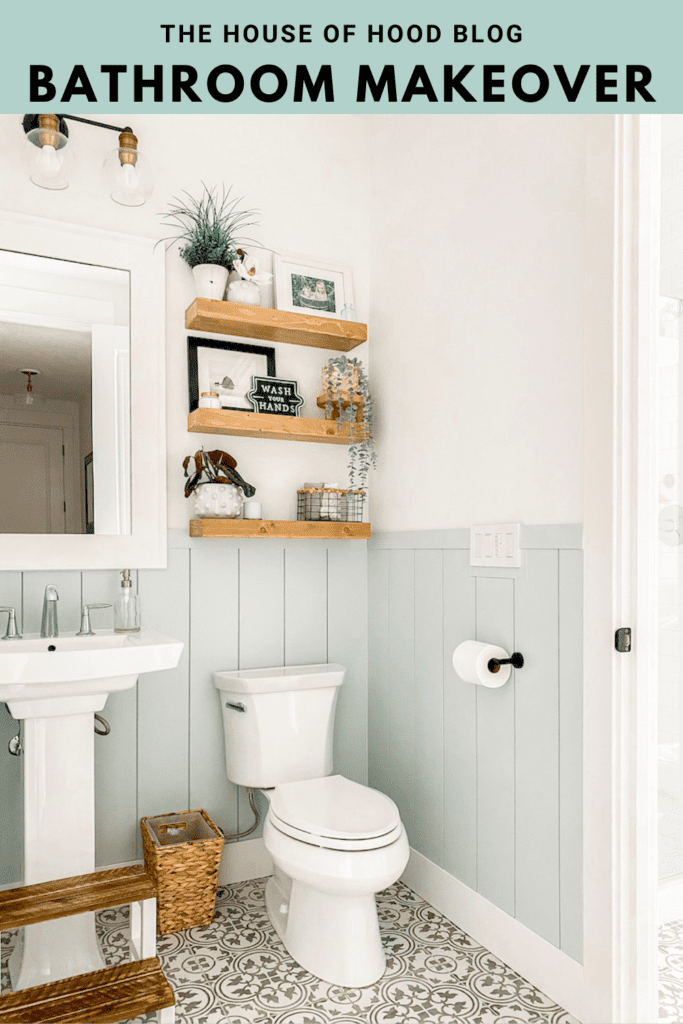
Bathroom Decor, Easy DIY, Home Decor
Our downstairs powder room was really plain and needed a little color and texture. We decided to do bathroom shiplap in a vertical layout. I chose our favorite paint color and it was exactly what it needed! Read on below for all the details!

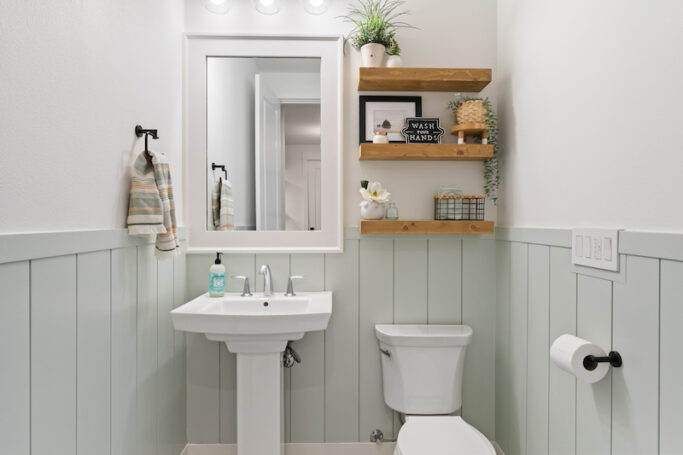
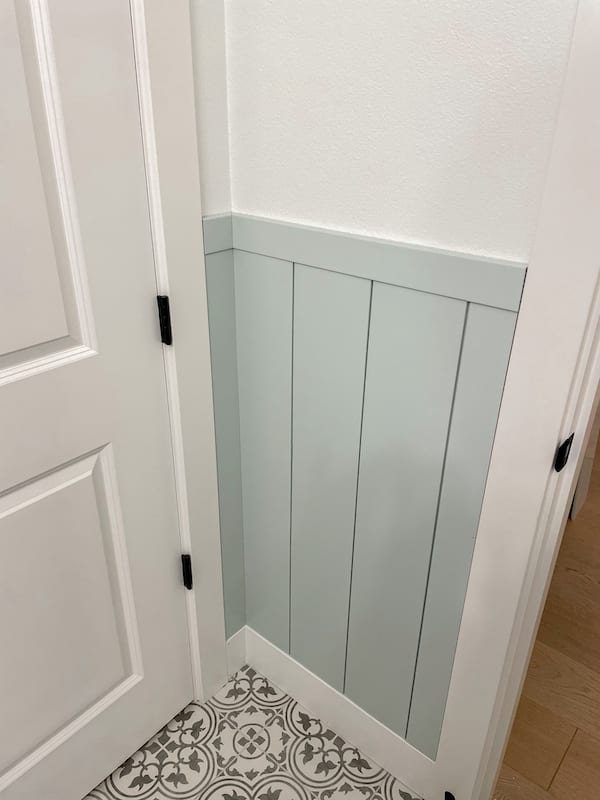
Shiplap has been trending for quite some time now but it really is a true classic. I love the look of it in a bathroom and I especially love vertical shiplap. Bead board is another option for bathroom walls, but I prefer the look of the thicker planks. We went with the color Sea Salt by Sherwin Williams. You can read more about this paint color here.

We always knew we wanted to add something to this bathroom. Originally we were thinking of adding tile, but I'm so happy with how this turned out.
If you've been installing shiplap around your home, I encourage you to try a vertical layout for something different! I'm pretty sure this will be the last shiplap wall in our home since we already have quite a bit!
Here is the before photo of our bathroom. It wasn't bad, just wasn't that exciting! The addition of the bathroom shiplap was much needed!

We did a tutorial on easily installing shiplap that you can check out here. This was installed horizontally, but will give you an idea on how to make circular cuts for light fixtures. In this case, we had to make those intricate cuts for plumbing and our sink.

Since we installed our shiplap vertically, we glued each board down since we wouldn't be hitting studs on each board. We used a construction adhesive. For our horizontal shiplap in our girls bathroom, we used a nail gun.

cuts around the sink (prior to caulking!)

For our vertical shiplap half wall, we decided to go 4 feet up the wall. Our ceilings are 9 feet, so this worked best for our space.
We trimmed it with a really simple piece which I like the best. Originally, we were thinking of adding a chair rail but I like this look much better! The trim is 2.5 inches.

here is the shiplap with the trim piece
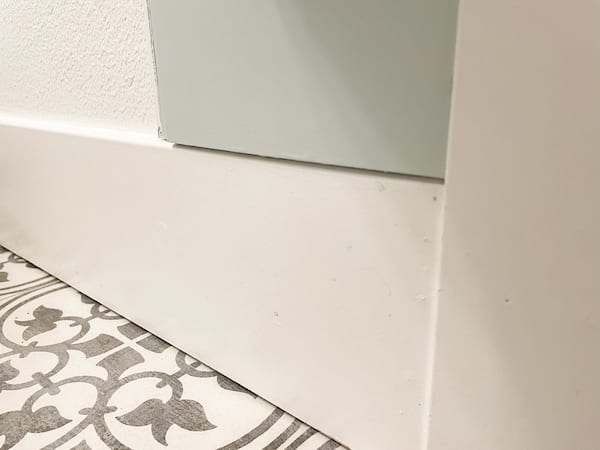
here is the thicker baseboard
We also removed the baseboard and added a new one so it would not sit flush with the added shiplap. This is a step that I highly recommend as it will look more finished.

these are the tools we used to remove the existing baseboard


We painted our shiplap in one of my all time favorite colors - Sea Salt by Sherwin Williams. We went with the Emerald Enamel. I can't say enough good things about this color!

We also used it in our master bedroom. You can see that post here! It's a really great color for bathrooms, laundry rooms, or bedrooms. It has a very coastal vibe and is just gorgeous!

I really love it paired with our main wall color which is Pure White by Sherwin Williams. We also have this on the exterior of our home which you can see more of here. Instead of spraying the shiplap after installation, we painted them prior.
You might wonder how shiplap in a bathroom holds. We have now had this shiplap in our bathroom an our girls bathroom for over two years and haven't had one issue! I
t looks and feels exactly how it did when we first installed it. I would highly recommend installing shiplap in your bathroom vs. wallpaper if you are debating!
I kept our decor pretty simple in here. I added my favorite pine wood shelves (we also have these in the playroom!) with a few simple vases, plants/greenery and photos.
Our flooring can be found here and we love it! We actually have it in our girls bathroom and in black in our laundry room. I think the grey looks really good with the Sea Salt paint.

shelves // wash your hands sign // framed photo
Other than the shelving, we added a new light fixture and moved the gold mirror to the wall next to the main door. This bathroom is actually a full bath with a shower in the room next to the toilet. It leads to our playroom which will eventually be a guest bedroom some day.


Our total cost was relatively low for this project. We spent $300. This covered the shiplap, baseboards, glue, caulk, and nails. We had paint left over from our bedroom project which worked perfectly.
Board and Batten Wall Tutorial // Sconce Light Hack // Master Bedroom Coastal Decor
I hope you enjoyed our bathroom makeover! Hopefully it has inspired you to recreate this look. Please let me know if you have any questions by leaving them in the comments below, or feel free to DM me on Instagram!
Pin this for later!
I love your bathroom! This is exactly the flooring I want to have. The link for it didn’t work for me. Could you share the details with me? Thanks 😊
Hi! Thank you so much! Here is a link:https://rstyle.me/+gg4s9vFg32gA839YMVzMwg
Hopefully that works ok 🙂
Hi! Loved this design and I’m using as inspiration for my half bath redesign. Can you tell me the width of your ship lap?
Thanks!
Hi! Thank you so much. The shiplap is 5.5 inches in width 🙂 Hopefully that helps!